") I remember that about 10 years ago I used to have a locket that I loved to wear on a daily basis. It wasn't even so much that the necklace itself was awesome, I think I just loved having a secret photo compartment where I could keep a photo of my ultimate crush (my now husband, Todd). I've never really gotten another locket since that one bit the dust, and I think it's mostly because my tastes changed and I just wasn't a "necklace that looks like a locket" person anymore. Since my guy travels a lot for his musician job, I'm usually always interested in ways to keep his photos or notes nearby, and I remembered that a locket is actually the perfect way to do that! We teamed up with our friends at Canon USA to create a more subtle, modern take on a locket. I thought a "hidden" photo pendant would be just what I needed, and it turns out that it's really easy to do!
I remember that about 10 years ago I used to have a locket that I loved to wear on a daily basis. It wasn't even so much that the necklace itself was awesome, I think I just loved having a secret photo compartment where I could keep a photo of my ultimate crush (my now husband, Todd). I've never really gotten another locket since that one bit the dust, and I think it's mostly because my tastes changed and I just wasn't a "necklace that looks like a locket" person anymore. Since my guy travels a lot for his musician job, I'm usually always interested in ways to keep his photos or notes nearby, and I remembered that a locket is actually the perfect way to do that! We teamed up with our friends at Canon USA to create a more subtle, modern take on a locket. I thought a "hidden" photo pendant would be just what I needed, and it turns out that it's really easy to do!
") Supplies:
Supplies:
-2 heart stamping blanks
–Canon PIXMA MG7720 and photo paper
-scissors
-glue
-Mod Podge
-jump ring (I would get a variety pack so you have options.)
-chain of your choice
-jewelry needle nose pliers
-small hole punch (optional)
") First you'll want to choose a photo to put inside your necklace. Measure your stamping blank and try to resize your photo to a good size so that the main part of your face/faces will fit inside the heart area. I made mine a few sizes (some a little bigger and some a little smaller) so I would have at least one that was the perfect size. My PIXMA MG7720 was perfect for this project since I could print a variety of sizes onto the photo paper and not lose any of the image quality.
First you'll want to choose a photo to put inside your necklace. Measure your stamping blank and try to resize your photo to a good size so that the main part of your face/faces will fit inside the heart area. I made mine a few sizes (some a little bigger and some a little smaller) so I would have at least one that was the perfect size. My PIXMA MG7720 was perfect for this project since I could print a variety of sizes onto the photo paper and not lose any of the image quality.
")
") On a blank spot of paper, trace your heart pendant and use scissors to cut out the shape. Place the cut out stencil over each size photo until you find one that has the right size for the locket. Trace the stencil onto the photo, and then cut the photo out.
On a blank spot of paper, trace your heart pendant and use scissors to cut out the shape. Place the cut out stencil over each size photo until you find one that has the right size for the locket. Trace the stencil onto the photo, and then cut the photo out.
") Glue the photo onto the top side of one of your hearts and let it completely dry (the Mod Podge won't work for this part, you'll need a multi surface glue to attach the photo). Once dry, brush a coat of Mod Podge over top of the image and let it dry (you can do a second coat if you like). Once the sealer is dry, punch a hole in the photo where the hanging hole is in the heart (or if you don't have the right size hole punch, you can also cut out a "true" heart shaped photo when you cut it out, avoiding the hanging hole area all together).
Glue the photo onto the top side of one of your hearts and let it completely dry (the Mod Podge won't work for this part, you'll need a multi surface glue to attach the photo). Once dry, brush a coat of Mod Podge over top of the image and let it dry (you can do a second coat if you like). Once the sealer is dry, punch a hole in the photo where the hanging hole is in the heart (or if you don't have the right size hole punch, you can also cut out a "true" heart shaped photo when you cut it out, avoiding the hanging hole area all together).
") Place your second heart on top of the one with the photo, and use pliers and a jump ring to connect the two. Attach your swinging locket pendant to a chain, and your necklace is complete!
Place your second heart on top of the one with the photo, and use pliers and a jump ring to connect the two. Attach your swinging locket pendant to a chain, and your necklace is complete!
")
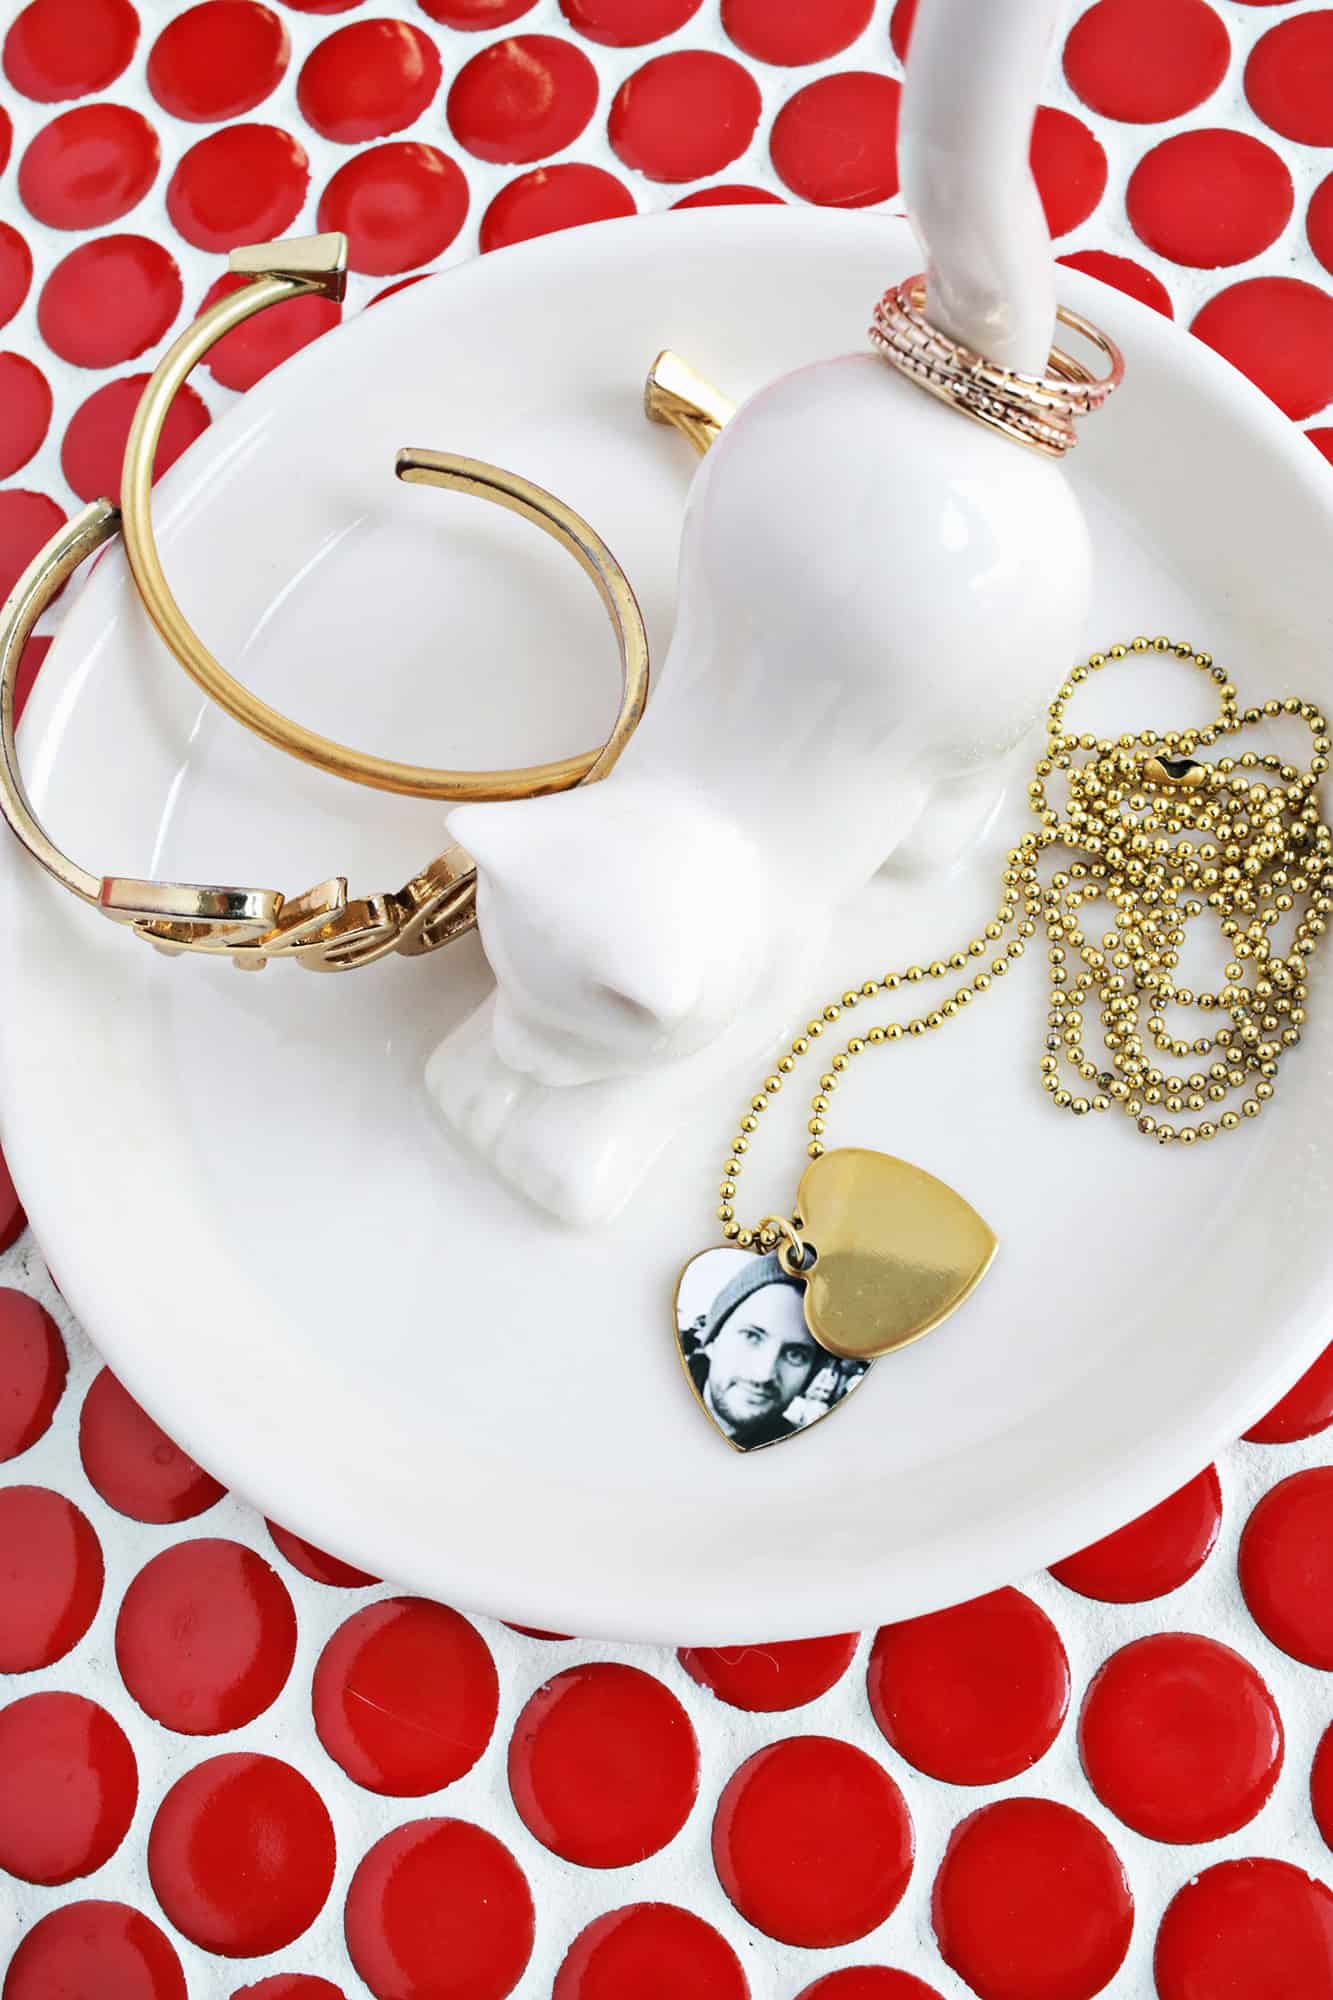
") The great thing about this necklace is that it looks pretty "normal" from the front, and it's not until you slide the top one to the side that your secret photo appears—surprise! It's great to have a cute wearable item to feel like a loved one is always nearby, and this would be a great gift as well! I think whoever you give one to will be able to tell that it's "from the heart." 😉 xo. Laura
The great thing about this necklace is that it looks pretty "normal" from the front, and it's not until you slide the top one to the side that your secret photo appears—surprise! It's great to have a cute wearable item to feel like a loved one is always nearby, and this would be a great gift as well! I think whoever you give one to will be able to tell that it's "from the heart." 😉 xo. Laura
Credits // Author and Photography: Laura Gummerman.
0 Response to "How to Make Origami Heart Locket"
Post a Comment